Tag: how to make coffee

How to make Greek Coffee

I had a bit of a crash course in making Greek coffee yesterday. We had an incredible lunch, hosted by a Greek family, Mima took me through the steps. I photographed them for your benefit. Basically you are trying to make coffee that is almost toffee.

You start by measuring the amount of water you want for your cup.

Then you add two and a half teaspoons of sugar to your heating water.

And two and a half teaspoons of very finely ground coffee.

Then you stir. And stir. And stir. Forty times clockwise, then forty times anti-clockwise.

You wait for the coffee to visibly thicken – like the first sign that sugar is caramelising.

Then you serve it immediately.

How to make Greek Coffee

Five Steps to Better Coffee: Step Five: The Milk

Milk can make or break your coffee. Good milk gives your coffee that velvety texture and takes the edge off any residual bitterness. Bad milk makes the coffee appear thermonuclear – have you ever had one of those takeaway coffees that seems to get hotter rather than colder in your hand?

The key to a great milk based coffee (and to latte art) is steaming the milk properly, or if you’re heating milk for your plunger coffee or stovetop – not overheating it.

When you’re steaming milk using an espresso machine there are a couple of things to watch out for. Firstly, you don’t want to boil or overheat your milk. Milk is best at somewhere between 55 and 65 degrees. After 65 degrees the sugars and proteins in the milk start to break down and you end up with sour, burnt tasting flavours. A good rule of thumb (literally) is to put your thumb against the side of the jug as you steam the milk. When it gets too hot to hold your hand against for more than a second or two (and this obviously depends on how tough your hands are – so you might need to experiment) it’s just right. You can buy a milk thermometer, which is a worthwhile investment until you get a feel for what temperature you’re after. It’s also worth remembering that your milk will actually continue to heat up for a little while after you stop frothing it (before it begins to cool down). So stop a little bit below your target if you’re using a thermometer.

The other factor in good milk is texture. Good milk is like silk. It moves as a cohesive unit and has a nice glossy finish. Silky milk, also called microfoam, is what separates good coffee from bad. To get microfoam you need to manage the way air is injected into your milk by your steam wand. Your goal is to merge the milk and the air seamlessly. If you stick the wand too deep or two shallow it’ll blow air into your milk in a disruptive way – giving big bubbles. What you want is a whirlpool effect in your jug (some home machines can’t get a whirlpool – you might need a smaller jug, or just to focus on motion in the jug not just stagnant milk with bubbles forming). Tipping the jug on an angle towards the steam wand and holding the tip of the wand just below the surface of the milk is a good way to get a whirlpool happening. If your milk screams like you’re killing it you probably are.

Mastering milk will dramatically improve your coffee.

Some tips for getting your milk right:

  • Practice getting the motion in your jug right using water – it’s cheaper than milk and moves in the same way.
  • Don’t overfill your jug – you want your milk’s volume to expand by about 50% and you want enough room in the jug to manoeuvre its position to get the motion right.
  • Get a feel for the temperature you’re aiming for – the thermometer is handy to begin with, but it will interfere slightly in your attempt to get a whirlpool motion happening.
  • Don’t burn your milk – smell a batch of burnt milk to know what it is you’re trying to avoid.

Five Steps to Better Coffee: Step Four: The extraction

You’ve got your coffee ready to go after following steps one, two and three – and now it’s time to complete the science of extracting the coffee flavour and caffeine you’re looking for from your cuppa. Here we’ll provide a few tips on espresso extraction, plunger preparation and a guide to stovetop espresso.

Espresso
Espresso is to coffee what nectar is to fruit juice. It’s thick. It’s undiluted. And it’s the basis of most coffee drinks you’ll buy out and about in Australian cafes.

There are, as in every step of the preparation process, a number of variables to be aware of when it comes to extracting your espresso. Essentially, the temperature of the water, the time taken, and the pressure applied to the coffee are the big three.

Water temperature
One of the biggest (and most common) crimes in coffee preparation is using water that is too hot. A lot of machines will overheat if left on too long. Water will sit in the boiler or thermoblock and heat past 96 degrees (about spot on for espresso). The easiest way to overcome this is to flush hot water from the system before pulling your shot (coffee jargon for pushing the button, espresso machines historically used levers for the process of extracting coffee).

If the water is too cold it won’t cause the coffee oils to separate from the granules, if it’s too hot it’ll get too much oil on the way through. Leaving your coffee bitter. If you like bitter coffee use water that is too hot and extract for too long – it’s all about personal taste.

Shot time
The time taken for a shot is important – if the water is in contact with the coffee for too long it absorbs too much coffee oil and becomes bitter, if the water is in contact with the coffee for too short a time (if the coffee shoots through the coffee quickly) it won’t pick up any of these oils and will taste like brown water.

The Specialty Coffee Association of America, a leading authority, suggests ideal shot times of 20 seconds, the generally accepted principle is that between 20 and 30 seconds is ideal.

Pressure
Until recently playing around with pressure during the shot has been largely impossible (this is changing with the latest and greatest commercial machines). When it comes to home machines it’s a matter of finding a machine that will pump water through your coffee at about 9 bar of pressure (15 bar machines are a little misleading).

Plunger tips

  • Boil water.
  • Grind coffee coarsely use about 8gm per 250mL of water.
  • Pour the boiling water into the plunger to heat it (and put the plunger part in.
  • Let the water cool a couple of degrees.
  • Add the coffee
  • Stir and replace the plunger
  • Plunge after 3-4 mins. Push down firmly but slowly.

Stovetop tips

  • Put in less water than recommended on the box, use more coffee than for machine produced espresso.
  • Tamp the coffee (not too hard).
  • Start with hot/boiling in the chamber (use a kettle first). You’ll need to wear an oven mitt or something as you screw the top on.
  • Put on medium heat, use a pre-heated element.
  • As soon coffee starts flowing remove it from the heat.

This should produce thick and rich stovetop coffee with a layer of crema.

Five steps to better coffee: Step Three: The dose

Once you’ve got your supply of fresh beans and your grind sorted it’s time to make your coffee – the next step where coffee often fails is in the “dose” – in espresso preparation this is the amount of coffee ground and tamped into your portafiller basket. The portafiller is the fancy name for “the handle that goes into the machine.”

The amount of coffee used per cup is also important in all other methods of coffee preparation, but it is one of the most controllable variables in your coffee preparation routine. Some baristas seeking to control every variable to the nearest micro detail will even weigh the ground coffee before making their drinks. Others will develop a consistent routine to ensure they get the same result every time.

When it comes to espresso getting the dose wrong can have profound impacts on your extraction, too much and the coffee will stall or pour too slowly. The ideal for espresso is for about 30mL in 25-30 seconds, a shot that takes longer, called a ristretto, is thicker, oilier, and becoming increasingly popular in specialty cafes. Ristrettos can be achieved by increasing your dose.

The basic routine for espresso dosing is to grind your coffee into the portafiller basket until it is heaped over the top. A good tip at this point is to use the double shot basket even when you’re only going to use a single shot. It tastes better.

Bang it against a flat surface a few times (aim for the same number every time) to settle the coffee – you don’t want big gaps or different densities in the puck your coffee will form in the basket – having uniform density means the water has to travel through the coffee evenly.

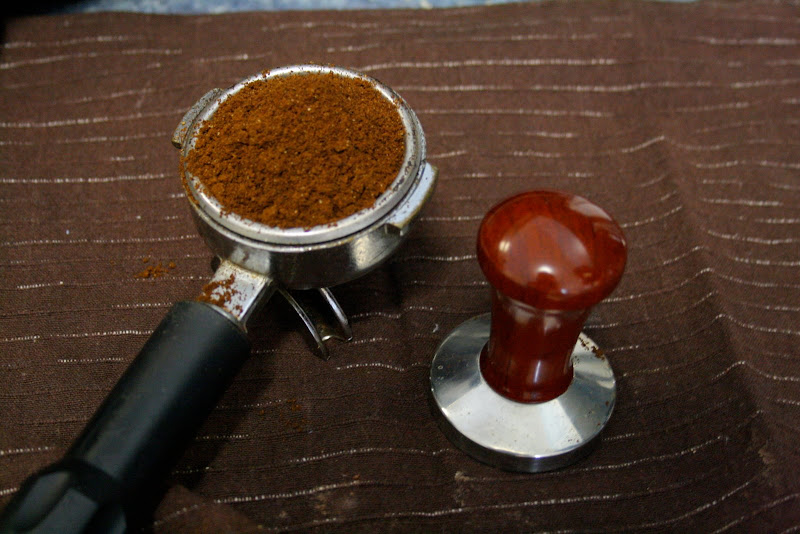
Next, level off the coffee with a flat surface (use the same thing each time – most baristas use their fingers, but you can use the back of a bread knife or buy expensive dosing tools). Volume is more important than weight – different beans have different densities and it’s important to have the same volume of coffee in the basket each time rather than the same weight, but a ball park is 14gm for a double shot.

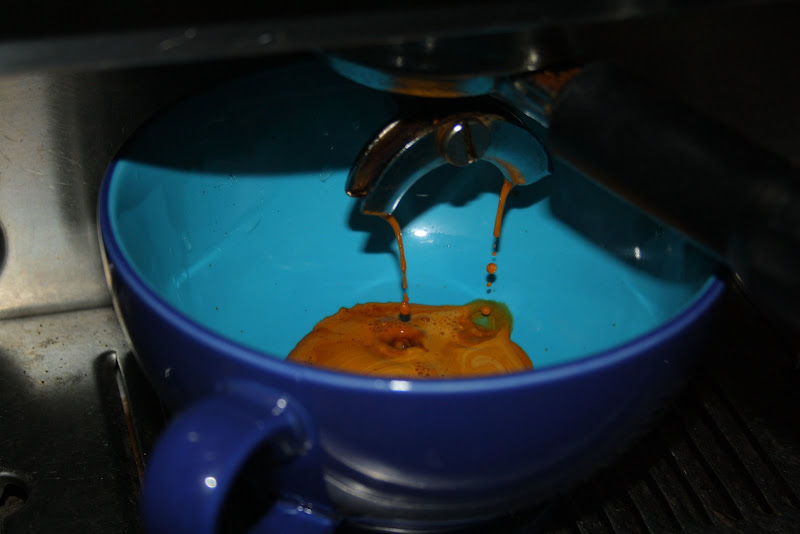
Then tamp (push down on) the coffee firmly – some people suggest tamping with 15kg of force (you can practice on bathroom scales, practice pushing down on them with your tamper/flat round surface until it reads 15kg or thereabouts). When the coffee is tamped properly you should be able to flip the portafiller upside down without getting coffee all over your bench, once you’ve got the coffee in the basket it’s time to extract your shot.

When it comes to dosing for your plunger coffee or filtered/percolated coffee there are ideal ratios of coffee to water – that are also best calculated using volume. For a plunger, also called a “French Press” or a presspot, the ratio is one heaped tablespoon per cup of coffee. Brewed coffee (percolaters, drip filters, etc) needs about two tablespoons for one and a half cups.