Tag: five steps to better coffee

How to do (good) coffee at church

This post is a response to a request on Twitter, but hopefully it’ll be a handy little resource for the long term…

There are lots of good reasons to ditch instant coffee at church morning teas – it tastes awful, it potentially reveals a shoddy doctrine of creation (and is one of the 7 deadly coffee sins), it’s (generally) less likely to be ethical, and doing coffee well is a chance to show your newcomers (and regulars) that you care about them.

Did you know that “no es cafe,” essentially nescafe means “is not coffee” in Spanish…

Anyway. Once you’ve decided to ditch the dirt from the church menu – you’re faced with a few conundrums.

Here are the three big questions (and some sub questions that’ll each send you in a different direction).

Some Questions

1. Who is it for? New people, or everyone? free? or paid? Covering costs? Making a profit?

2. What’s your budget? Are you going to buy a commercial machine with all the bells and whistles? lease one? Get a second hand ex-cafe machine on eBay? Get a giant percolator? And where are you going to get your beans? The supermarket (urgh)? A local roaster (mmm)? Roast your own? Will they be “ethical”? What program will you use (you know Fairtrade is stupid. Right?)

3. Who is going to run things? Who’ll man the machine? Who’ll do the training? Who’ll monitor supplies? Who’ll clean up?

Some Answers

The answers to these questions will depend largely on your church context – who your immediate mission field is and how many people you have who are able to help carry the load.

Here are some universal principles for answering these questions and providing good coffee at church – you can read more about these in my five steps to better coffee eBook for just $5… That’s right. $5.

1. Fresh coffee is best. Both roasted, and ground – that’s why I’d lean towards roasting your own, or getting into some sort of relationship with a roaster. You’ll probably need to buy a grinder, or, if you’re going the percolator route – get your coffee ground for your percolator as close to when you brew as possible.

2. Consistency is important. If you’re going to sell your coffee at church and you want to use the money to sustain a coffee ministry (in our case this happens at things like the playgroup that our building hosts during the week), then you want the product you’re offering to be trustworthy and good.

3. If you’re going to buy a second hand machine – choose carefully. I’ve now bought six used commercial machines on eBay for a 4-2 scoreline (priced between $270 and $750 excluding freight) – two were lemons (one was a lemon where the spare parts more than justified the cost), one needed pretty major work to get up and running.

4. If you go with a commercial espresso machine you have to think about incidental issues like electricity and water supply – some machines will happily draw from a tank (generally those with rotary motors), others might need plumbing in. Most will need 15A and above, power wise (the normal run of the mill socket is 10A).

5. Don’t make people pay. I’m a firm believer that hospitality is an important part of what we do on a Sunday both for the congregation and our guests. I’m not opposed to providing a “premium” option at a cost, if there’s a free option also.  

A percolator using the right amount of fresh coffee, appropriately roasted, with attention paid to the brew cycle (where it isn’t left to stew for too long), will produce brilliant coffee with less fuss, less mess, and at a cheaper cost. So that is a more than adequate solution in most cases. But if you’d like something a little more high brow…

Two Case Studies

I’ve now set up Sheila (one of my pride and joys), my three group Rancilio Z-11 beast, at two different churches. Sheila, a tank (google Red V Blue, Season 1), is from an era when people knew how to make coffee machines. At one point I had rewired her to run on 10A power, but this meant she took 45 minutes to heat up. She’s now properly serviced, and running at full capacity on our coffee cart at Creek Road.

The first church, Clayfield Pressy, was a church of around 50 people, in a relatively high income pocket of Brisbane, there was just one morning service to cater for – it was a no brainer to make coffees for the 65% of the crowd who drink it, most weeks. I supplied the coffee at no cost (I roasted it myself), we had a small Sunbeam grinder, or I’d bring mine from home, and we upped the weekly milk order by two or three bottles.

Because the coffee was free, there was no need to provide an alternative option. I’d estimate I was going through about $5 worth of coffee a week, at cost (roasting for yourself is much cheaper – depending on the scale of your operation), and 8-10 litres of milk (I was also doing hot chocolates).

After I left, Clayfield purchased a relatively new Boema machine – they’re Australian made. I have no idea how often it gets used now.

Sheila came with me to Creek Road. For the first ten months or so of last year, she occupied pride of place in our Connect Lounge – the first port of call for newcomers at our church. We supplied coffee in that lounge after all three services.

Regulars who attend our 8:30 service, which is followed by morning tea, were supplied with percolator coffee made in a big percolator/urn (I’m relatively fond of these, given a light roast, and coarse grind). I was roasting for both the newcomers lounge, and the percolator. We were using about 1kg of coffee a week.

We’ve made the decision – thanks to some equally passionate people on staff at Creek Road, to invest into coffee as part of our ministry strategy. We’re keen to not only supply coffee to newcomers, but to be able to get on the road and support local chaplains by providing coffee at school functions, and we want to offer coffee at our “connect” ministries (the aforementioned playgroups, our annual mission week/kids club). So we’ve purchased a 2nd grinder, and a semi-commercial machine (new) for the Connect Lounge, and set up a coffee cart, featuring Sheila, for the congregation to be able to purchase this coffee for $3 a pop after all our services (and before all but the 8:30 service) – this will fund the operation of these ministries and hopefully the investment into equipment. We’re continuing to provide percolator coffee at morning tea.

I’m no longer roasting – we’ve entered into an agreement with Cleanskin Coffee, a Brisbane company, that roasts well chosen ethical coffee, spends some of the proceeds on development in producing companies, and gives us a generous price, as well as the promise of training for our baristas should they need it. This has been a good solution for us – it frees up some of my time to do other things, and means we’re getting consistently good coffee in a way that adequately answers the relevant questions from above.

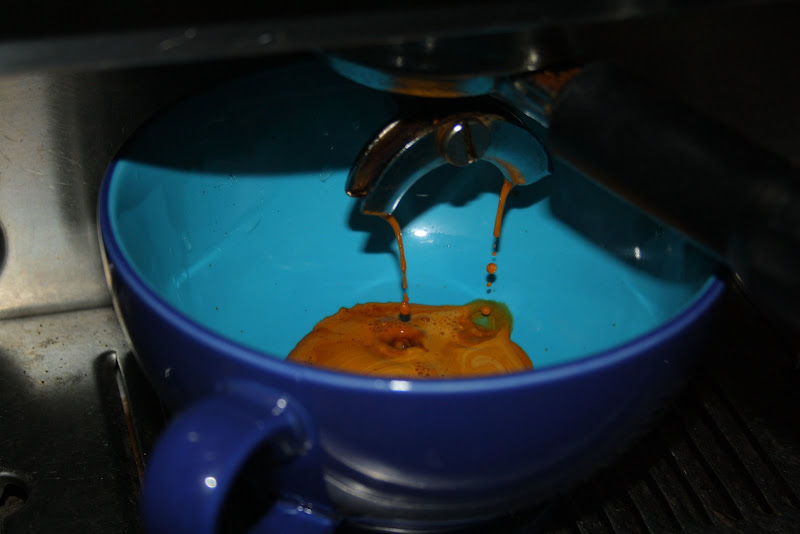
It also means we can produce coffee that looks something like this, at church… as part of the testimony to how we love and value our newcomers… did someone mention ethos

Some Recommendations

So what have I learned from these case studies… and the countless hours I’ve poured into making better coffee.

1. People appreciate good coffee (especially if it’s free) – especially the particular breed of person who is a bit snobby about coffee. We live in an age where people are increasingly taking good coffee for granted – I’m not suggesting we give in to fads and trends, but surely we can do better than International Roast.

2. It takes effort – time, human resources, money – it’s a big commitment to step up from urn to espresso for visitors to espresso for everybody.

3. It’s important to be transparent – both in terms of where your coffee is coming from, and where any money is going.

4. Be choosy about the equipment you buy – If you’re going to buy a commercial machine look at parts sites to make sure parts for your machine are readily available. Coffeeparts.com.au is your friend. I love my Rancilio machine – I’ve bought an Expobar, 2 Boemas, and 3 Rancilios. The only problem with the Rancilio that didn’t work is that it requires plumbing in – other than that it’s a 20 year old machine that works perfectly.

5. Seriously consider leasing – Buying your gear is probably the best bet, if you can find some good second hand deals that aren’t complete lemons, but finding a bean supplier who is prepared to cut you a good deal on a lease machine, especially if you’re going to use it a fair bit during the week will give you some more predictable costs (though they’ll be higher in the long run if you score a gem of a machine – Sheila cost me about $750 from the point of purchase to the point of pouring delicious shots), it’ll mean your machine is newer, more reliable, and maintenance is often included.

6. People will drink less than you think they will – except when you under cater – Figuring how much coffee to roast and how much milk to buy is a bit of a lottery.

7. It’s pretty cheap to make good coffee if you’re not paying staff – Some basic maths – a standard take away cup (8 ounce) holds 250mL. Pouring a standard espresso shot that means 220mL of milk. This is textured milk – so it’s lets assume that’s about 150 mL of milk per cup. That means you get 13 cups per litre. Which, at $1 a litre means you’re paying about 7c a cup for milk, an 18-20gm dose in a double shot basket (lets assume 20), will give you 100 shots per kilo of coffee, if you’re paying $25/kg (I can roast you coffee at that price), you’re looking at 25c per shot, factor in about 20c for a cup and lid (that’s on the high side) and we’re talking 52c per cup.

8. A simple menu is the best way to ensure consistency – this is the one thing I didn’t get my way on with our current set up. Differences between types of coffees, if you’ve only got one cup size, are essentially meaningless if you’re aiming for microfoamed milk. Sure. You could add some chocolate powder to a long white with microfoam and call it a cappuccino – but flat whites, lattes, and cappuccinos are essentially indistinguishable if your milk is a uniform texture (or as close to as possible). If I had my way we’d offer short/long black/white – giving people a total of four combinations (a long black, a short black, a picolo, and a flat white). This would cut down on stupidity as people ask for whatever their normal coffee order is, and your volunteer baristas stand there scratching their heads trying to figure out how to make a macchiato. It means you only have to train people to make four drinks.

I wrote an eBook: 5 Steps to Better Coffee

Friends, countrymen, lend me your ears, your eyes, your wallets, and then give me $5. And in return, I’ll give you an eBook that I like to call 5 Steps to Better Coffee.

Cover jpg

Seriously – at $5 this is a bargain. It contains way more than $5 worth of valuable information that you will find nowhere else except the internet. Buy one. Tell your friends. It’ll change your life.

I learned some fun things about eBooks in the process of putting this together. Here are some of my reflections.

1. Amazon’s self publishing thing doesn’t really like PDFs, especially those with text boxes and pictures.
2. You can make pretty nice (free) 3D covers using 3D Box Maker.
3. There’s a really easy way to sell files if you’ve got a PayPal business account – it’s called UploadnSell.com. I looked for all sorts of ways to deliver files to people automatically when they gave me money. They were all difficult. This was easy.
4. Pricing eBooks is hard. It’s hard figuring out what something intangible is worth. If you go too cheap people will think it’s rubbish, too expensive and people won’t buy it… I went for $5 because that’s $1 a step (as people have now pointed out both on Facebook and Twitter).

I’ve got a few other little eBook ideas up my sleeves. So watch this space.

What do you reckon – is $5 a fair price for a 25 page eBook? What would you charge?

Five Steps to Better Coffee: Step Five: The Milk

Milk can make or break your coffee. Good milk gives your coffee that velvety texture and takes the edge off any residual bitterness. Bad milk makes the coffee appear thermonuclear – have you ever had one of those takeaway coffees that seems to get hotter rather than colder in your hand?

The key to a great milk based coffee (and to latte art) is steaming the milk properly, or if you’re heating milk for your plunger coffee or stovetop – not overheating it.

When you’re steaming milk using an espresso machine there are a couple of things to watch out for. Firstly, you don’t want to boil or overheat your milk. Milk is best at somewhere between 55 and 65 degrees. After 65 degrees the sugars and proteins in the milk start to break down and you end up with sour, burnt tasting flavours. A good rule of thumb (literally) is to put your thumb against the side of the jug as you steam the milk. When it gets too hot to hold your hand against for more than a second or two (and this obviously depends on how tough your hands are – so you might need to experiment) it’s just right. You can buy a milk thermometer, which is a worthwhile investment until you get a feel for what temperature you’re after. It’s also worth remembering that your milk will actually continue to heat up for a little while after you stop frothing it (before it begins to cool down). So stop a little bit below your target if you’re using a thermometer.

The other factor in good milk is texture. Good milk is like silk. It moves as a cohesive unit and has a nice glossy finish. Silky milk, also called microfoam, is what separates good coffee from bad. To get microfoam you need to manage the way air is injected into your milk by your steam wand. Your goal is to merge the milk and the air seamlessly. If you stick the wand too deep or two shallow it’ll blow air into your milk in a disruptive way – giving big bubbles. What you want is a whirlpool effect in your jug (some home machines can’t get a whirlpool – you might need a smaller jug, or just to focus on motion in the jug not just stagnant milk with bubbles forming). Tipping the jug on an angle towards the steam wand and holding the tip of the wand just below the surface of the milk is a good way to get a whirlpool happening. If your milk screams like you’re killing it you probably are.

Mastering milk will dramatically improve your coffee.

Some tips for getting your milk right:

  • Practice getting the motion in your jug right using water – it’s cheaper than milk and moves in the same way.
  • Don’t overfill your jug – you want your milk’s volume to expand by about 50% and you want enough room in the jug to manoeuvre its position to get the motion right.
  • Get a feel for the temperature you’re aiming for – the thermometer is handy to begin with, but it will interfere slightly in your attempt to get a whirlpool motion happening.
  • Don’t burn your milk – smell a batch of burnt milk to know what it is you’re trying to avoid.

Five Steps to Better Coffee: Step Four: The extraction

You’ve got your coffee ready to go after following steps one, two and three – and now it’s time to complete the science of extracting the coffee flavour and caffeine you’re looking for from your cuppa. Here we’ll provide a few tips on espresso extraction, plunger preparation and a guide to stovetop espresso.

Espresso
Espresso is to coffee what nectar is to fruit juice. It’s thick. It’s undiluted. And it’s the basis of most coffee drinks you’ll buy out and about in Australian cafes.

There are, as in every step of the preparation process, a number of variables to be aware of when it comes to extracting your espresso. Essentially, the temperature of the water, the time taken, and the pressure applied to the coffee are the big three.

Water temperature
One of the biggest (and most common) crimes in coffee preparation is using water that is too hot. A lot of machines will overheat if left on too long. Water will sit in the boiler or thermoblock and heat past 96 degrees (about spot on for espresso). The easiest way to overcome this is to flush hot water from the system before pulling your shot (coffee jargon for pushing the button, espresso machines historically used levers for the process of extracting coffee).

If the water is too cold it won’t cause the coffee oils to separate from the granules, if it’s too hot it’ll get too much oil on the way through. Leaving your coffee bitter. If you like bitter coffee use water that is too hot and extract for too long – it’s all about personal taste.

Shot time
The time taken for a shot is important – if the water is in contact with the coffee for too long it absorbs too much coffee oil and becomes bitter, if the water is in contact with the coffee for too short a time (if the coffee shoots through the coffee quickly) it won’t pick up any of these oils and will taste like brown water.

The Specialty Coffee Association of America, a leading authority, suggests ideal shot times of 20 seconds, the generally accepted principle is that between 20 and 30 seconds is ideal.

Pressure
Until recently playing around with pressure during the shot has been largely impossible (this is changing with the latest and greatest commercial machines). When it comes to home machines it’s a matter of finding a machine that will pump water through your coffee at about 9 bar of pressure (15 bar machines are a little misleading).

Plunger tips

  • Boil water.
  • Grind coffee coarsely use about 8gm per 250mL of water.
  • Pour the boiling water into the plunger to heat it (and put the plunger part in.
  • Let the water cool a couple of degrees.
  • Add the coffee
  • Stir and replace the plunger
  • Plunge after 3-4 mins. Push down firmly but slowly.

Stovetop tips

  • Put in less water than recommended on the box, use more coffee than for machine produced espresso.
  • Tamp the coffee (not too hard).
  • Start with hot/boiling in the chamber (use a kettle first). You’ll need to wear an oven mitt or something as you screw the top on.
  • Put on medium heat, use a pre-heated element.
  • As soon coffee starts flowing remove it from the heat.

This should produce thick and rich stovetop coffee with a layer of crema.

Five steps to better coffee: Step Three: The dose

Once you’ve got your supply of fresh beans and your grind sorted it’s time to make your coffee – the next step where coffee often fails is in the “dose” – in espresso preparation this is the amount of coffee ground and tamped into your portafiller basket. The portafiller is the fancy name for “the handle that goes into the machine.”

The amount of coffee used per cup is also important in all other methods of coffee preparation, but it is one of the most controllable variables in your coffee preparation routine. Some baristas seeking to control every variable to the nearest micro detail will even weigh the ground coffee before making their drinks. Others will develop a consistent routine to ensure they get the same result every time.

When it comes to espresso getting the dose wrong can have profound impacts on your extraction, too much and the coffee will stall or pour too slowly. The ideal for espresso is for about 30mL in 25-30 seconds, a shot that takes longer, called a ristretto, is thicker, oilier, and becoming increasingly popular in specialty cafes. Ristrettos can be achieved by increasing your dose.

The basic routine for espresso dosing is to grind your coffee into the portafiller basket until it is heaped over the top. A good tip at this point is to use the double shot basket even when you’re only going to use a single shot. It tastes better.

Bang it against a flat surface a few times (aim for the same number every time) to settle the coffee – you don’t want big gaps or different densities in the puck your coffee will form in the basket – having uniform density means the water has to travel through the coffee evenly.

Next, level off the coffee with a flat surface (use the same thing each time – most baristas use their fingers, but you can use the back of a bread knife or buy expensive dosing tools). Volume is more important than weight – different beans have different densities and it’s important to have the same volume of coffee in the basket each time rather than the same weight, but a ball park is 14gm for a double shot.

Then tamp (push down on) the coffee firmly – some people suggest tamping with 15kg of force (you can practice on bathroom scales, practice pushing down on them with your tamper/flat round surface until it reads 15kg or thereabouts). When the coffee is tamped properly you should be able to flip the portafiller upside down without getting coffee all over your bench, once you’ve got the coffee in the basket it’s time to extract your shot.

When it comes to dosing for your plunger coffee or filtered/percolated coffee there are ideal ratios of coffee to water – that are also best calculated using volume. For a plunger, also called a “French Press” or a presspot, the ratio is one heaped tablespoon per cup of coffee. Brewed coffee (percolaters, drip filters, etc) needs about two tablespoons for one and a half cups.

Five steps to better coffee: Step Two: The Grind

So, with step one complete, you’ll have the best beans for the job. The next step in any preparation of coffee is turning the beans into coffee ready for your machine, pot, or plunger.

The fundamental principle of coffee preparation is reproducability. The one commandment of coffee making is though shalt control your variables. We’ll move on to aiming to consistently reproduce the same routine in the next step – but getting the grind is fundamental.

Grinding immediately before use will dramatically enhance your coffee. But not all grinders are created equal. There are two “families” of grinder – burr and blade. Blade grinders aren’t ideal. They’re slightly better than nothing. But unless you do exactly the same thing every time with the same number of beans at the same weight being bashed by the blade the same number of times, you’re not going to get consistency. You’ll never get uniform sized particles and you’ll probably overheat the coffee particles due to friction. If you grind too fine you’ll overwhelm yourself with coffee that has too much oil and is too bitter.

They are a good stepping stone to improving your coffee at home – and if you want to start off with a blade grinder here are some tips:

  • Don’t hold the button down for ages and batter the coffee into dust.
  • Pulse the button for short bursts (two to five seconds) to avoid overheating the ground coffee.
  • For a fine grind go for about 20 seconds of these bursts, for a coarse grind aim for around 10 seconds.
  • These work better for plunger and filter coffee than for espresso.

Burr grinders are more expensive. But with reason. They are more mechanically complex and they produce a better result. The burrs lock together like cogs crushing the coffee into evenly sized particles. You can control the size of the particles by moving the burrs closer or further apart. You need a different sized particle for every machine and for every different brewing method (extra-fine for Turkish, fine for espresso, medium for drip filter and large for plunger).

Tips for choosing a burr grinder

  • Be prepared to spend more on the grinder than the machine (unless you’re buying a $1000 plus machine).
  • Look for maximum adjustability in the grind size, “stepless” is better than “stepped”…
  • Be prepared to waste some coffee finding the right settings.
  • Clean the grinder regularly to avoid build ups of stale coffee.
  • Steer clear of dosered grinders for home use (grinders like they have at cafes with big chambers on the front).

A good guide to burr grinders available in Australia can be found here.

Five Steps to Better Coffee: Step One: The Beans

Coffee was discovered almost by accident, when a young African goat herder noticed his goats’ increased energy after they had chowed down on some funny looking berries. After much experimenting and many years of experimenting, turning the seeds of these berries into a drink became the preferred method of consumption.


Good coffee at home is just five easy steps away from reality. If you’ve wondered what the difference between the coffee you get in your favourite cafe and the stuff you produce at home is, and why yours doesn’t taste the same, then there are some simple factors that can go a long way towards making your coffee dreams a reality.

Good coffee is a science – but an accessible science. All coffee, be it espresso based, plunger (or French Press), pour-over, brewed, filtered… you name the method… is a matter of combining coffee oils with water. The factors involved in the taste at the end are many and varied – but the most important factor in determining whether a cup of coffee tastes good is the beans. If you put rubbish coffee into the process it doesn’t matter how rigorously you apply the science of coffee. You’ll end up with rubbish in the cup.

There are a lot of factors in the humble bean that will effect the taste of the final product. The ultimate goal is to find a bean flavour you like, and to stick with it (or know how changing the different variables will change the end result). The golden rule when it comes to coffee, and the one that you’ll want to keep no matter your preference for taste, is freshness. Freshly roasted beans, freshly ground. Coffee preparation is chemistry. If beans are not consumed within three weeks of roasting then most of the flavour has essentially evaporated (the beans become stale). If they’re not consumed within three minutes of grinding then most of the oils on the surface of your ground particles of coffee will have reacted to the air around them. You want to maximise the contact of coffee oils with water during the preparation process in order to bring the most flavour out of your beans.

Coffee tasters primarily talk about the taste of coffee in terms of flavour, acidity and body (how robust the flavour is, the consistency of a shot of coffee from watery to oily). In a shot of espresso the oils can separate from the rest of the shot to form a coloured layer called crema. This is full of acidy oil and unpleasant to taste by itself, but it also adds significantly to the body.

Here are the variables in the beans, and the steps you can take to maximise your enjoyment.

Freshly Roasted

Unless you’re prepared to roast your own beans at home (more on that later) you have to put your trust in a roasting company at this point. The key to a great cup of coffee is using your beans between about three days and three weeks of roasting (most coffee rules involve the number three). This rules out most coffee beans sold in supermarkets, and even most beans sold by chain cafes (like Gloria Jeans).

Here are some tips for getting freshly roasted coffee:

  • Buy direct from the roaster. There are boutique and large scale roasters operating all over Brisbane – from big players like Merlo, Campos, and Di Bella, to small operations like The Coffee Guy in Clayfield, Litse in Keperra, BlackStar and Cup in West End… There’s no excuse for not going to these guys – and you’re often paying similar prices per kilo to what you’re paying at Woolworths for better quality.
  • If you can’t buy direct from a roaster buy from a brand that roasts in Brisbane – try to cut out freight times. Don’t buy beans that are imported roasted from overseas or interstate. Avoid cafes that have bags of beans for sale from shelves that look like they sit there for weeks.
  • Wherever possible you should buy beans that come with a “roasted on” label on the bag.

Freshly Ground

Getting the grind right is essential for good coffee (it’s step two in our five steps). But if you’re not sure about grinding your own beans, the sooner you can get the coffee from the grinder to your cup the better. A good rule of thumb for coffee preparation is that you should spend more money on a grinder than a machine. We’ll cover grinding in more depth as we go – but you’ll get better coffee from a $20 stove top and $150 dollar grinder than from a $20 herb/coffee grinder and $150 machine. You’ll get better coffee from a $20 herb grinder than from a bag of pre-ground vacuum sealed beans off the supermarket shelf, and possibly marginally better coffee this way than if you buy small batches pre-ground from a specialty coffee shop.

Tips:

  • If you’re going to buy pre-ground coffee, buy it in small batches. Not by the kilo.
  • If you’re going to invest in a coffee set up for home get the grinder first.
  • It’s ok to start with a hand cranked burr grinder and a plunger.
  • Grind on demand. Don’t do a batch for the week. Avoid cafes that don’t grind to order. Every second counts.

Roast profile

Unless you’re roasting your own beans this is one of those things you don’t have any control over – and can’t possibly know for sure. Good roasters moderate the heat being applied to beans at every stage in a roast. Temperature control throughout the roast effects the even distribution of heat to the batch of beans and within the bean itself. Good roasters get the most out of their beans by considering the chemical reaction that occurs within a bean during a roast.

The visible signs of the “roast profile,” and the best way to characterise the roast as an end user, comes from how dark the beans are. Generally speaking, the darker the roast the stronger the coffee. As beans roast their composition changes somewhat – the coffee oils move to the surface of the beans as they get darker (they also get shinier as they darken). It’s a bit like chocolate – the lighter the beans, the sweeter they are, the darker they are the more bitter/strong the flavour is.  Light roasts also maintain the individual characteristics of different beans (we’ll get to “origin” in a moment).

Most roasters use the “roast profile” to modify the strength of both the caffeine hit from a coffee and its flavour. When a roaster says a coffee is strong they probably mean dark too. Figure out what you like. This is ultimately a matter of preference.

Freshness of green beans

Green bean freshness isn’t as important as the freshness of roasted beans. Green beans can be stored for a few years before roasting. But there is some evidence to suggest that coffees roasted sooner are a big “brighter” or zestier, while they become more mellow and earthy with age. These effects can also be created by using beans from different origins.

Storage

Keeping air away from beans is important. Vacuum sealed, or air tight containers are the best way to keep beans fresh. A simple zip lock bag with a one-way valve is fine. This valve is especially important for very freshly roasted coffee which is releasing gas as it stablilises. A sealed bag of coffee that puffs up between uses is a sure sign that beans are fresh. Drinking beans while they haven’t properly degassed results in a slightly effervescent (and unpleasant) cup.

Many roasters refrigerate their beans and advocate keeping beans in the fridge or freezer – this is on the whole a bad idea. If you do choose to refrigerate your beans it is important to allow them to come back to room temperature before grinding. Cold beans often become moist as they return to air temperature. This moisture is bad.

Blend/origin

The difference in flavour between coffee beans roasted with the same profile is determined by the conditions in which the beans are grown and prepared for roasting. There are heaps of variables in this process like soil acidity, the altitude the coffee is grown at, and how the coffee fruit is dried and stripped from the seeds (which become our beans…). Different origins have different properties which can be appreciated individually as “single origin” coffees or combined to form balanced blends making the most of different varieties. Professional coffee tasters use this tasting wheel to describe the characteristics of varieties of coffee based on taste and smell. Some people think this is a bit like wine tasting or selling snake oil – but it is helpful to characterise coffees based on levels of acidity and sweetness.

Image source: whole latte love

The first step towards better coffee is coming to terms with these factors and deciding what it is that you like in your mug. Once you know what you prefer you can begin to pursue that taste in every cup. And at that point it’s time to move on to steps two to five.

Five steps to better coffee

This Saturday night our church is hosting a coffee night with myself and former Di Bella Coffee Roaster Daniel Russell. Here’s the flier. You’re more than welcome to come along – RSVP in the comments.

I’m about to post five posts in a series “five steps to better coffee” which will become the booklet we give out on the night (hopefully). I’ll also do a bit of a dummies guide to home roasting.

If your church (in Brisbane) would like to run a similar night – let me know. I’m sure Dan and I can be talked into helping out…