Andrew isn’t just an opera singer about to hit the big time in Germany. He’s also a photographer of some repute. Here are his tips on low light photography. I’ll update this to include a link to his Flickr. If he’ll let me. I guess you’ll soon find out. Ahh, stuff it, it’s public domain. Here you go. Check his work out.
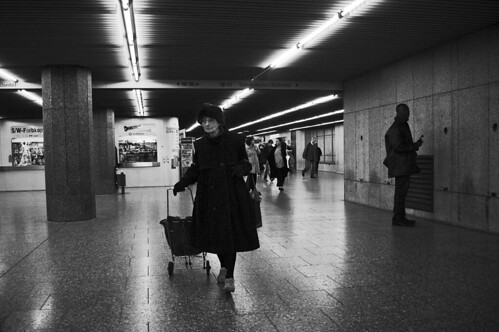
And here’s one of his photos – it is copyright so look but don’t touch (even though I’ve hypocritically stolen it – but we all know how I feel about copyright…).
A couple of years back I had a 10-tips article on photographing rock concerts published in JPG Mag (Read it here). So for Mad Skillz Week, here’s an adaptation of 5 tips for photographing in low light. Whether it’s a concert, candle-lit cuisine or the cool colours of the Eiffel Tower light-show, these tips will help make the most of difficult lighting situations.
No Flashing. Turn the flash off, it won’t help, and if it’s a classical concert*, it will get you kicked out. The flash will either not even reach the subject, or it will completely destroy an sense of performance or mood created by the low light.
The need for speed. This is where some manual control comes in handy. The idea is too get as fast a shutter speed as possible. If you can manually control this (like with SLR cameras and some digi-cams) you should aim for the hand-holding rule – a shutter speed that is equal to, or greater than the focal length of the lens (again, generally much easier with an SLR). Digi-cams with scene modes sometimes have a performance mode, otherwise, the portrait mode will open up the aperture, allowing for faster shutter speeds. If you have the option to turn the ISO sensitivity up, that will help greatly, though has the unfortunate side effect of introducing digital noise.
Closer. Related to the previous point – the less zoom you use, the slower the shutter speed you can get away with.
Brace. The best option is to use a tripod of some sort, otherwise, bracing the camera against a hard serface like a fence or a lamp-post can help reduce camera-shake. I keep a mini bean-bag in my camera bag so that I don’t scratch the camera in the process.
Squeeze. Another major cause of camera shake is pressing the shutter-release button. A gentle squeeze will help reduce the distrubance caused by pushing.
*Disclaimer: of course, you shouldn’t be taking photographs in professional performances, but if you happen to have a child star, then this will be of use.
Comments
But would the shutter speed rule depend on the feeling you were going for, and the amount of light you have? I find that if light is low enough, you have to crank up the ISO too far. And longer shutter speeds can have interesting effects on lights.
I wish every camera printed the "HOW TO TURN OFF YOUR FLASH" part of the instructions at the very beginning in big, bold letters. I was ready to smack people over the head trying to take photos inside the Sydney Opera House *with the flash on*. Way to give yourself away, idiot.
Yep, changing the shutter speed will have an effect, just as opening up the aperture will – it's all about balancing shutter speed and aperture. Smaller apertures (bigger number!) will require longer shutter speeds (as a general rule) and the longer the shutter is open the great the chance of blur. The focal-length shutter speed rule ( or the hand-holding rule) basically means that this is the slowest shutter speed you can use without camera-shake from your hands being an issue. If you can brace the camera or have a tripod, long shutter speeds will create nice effects with lights – particularly moving lights, but if you want to get a sharp image of a performer, you really can't go too long, and you'll need to crank up the iso and open the aperture as wide as possible.
As well as the flash – don't forget to turn of the AF-Assist light!
My opinion is that a noisy but sharp image is better than a non-noisy but blurry one.