Tag: recipes

Turducken 2012 (part 2): The proof is in the eating…

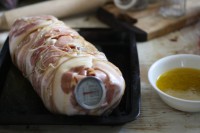
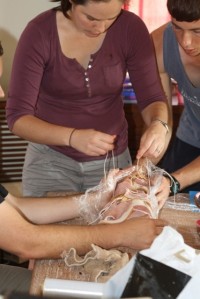
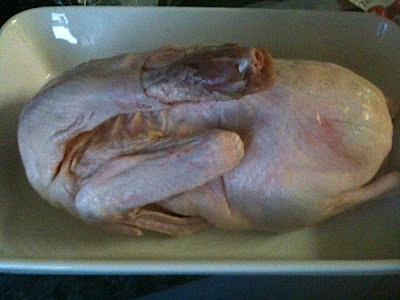
So we left part one with the turbaconucken (a turducken wrapped in bacon) sitting in the fridge ready for cooking and eating. And I don’t want to leave you hanging – it was tasty. And we’re all still alive. So it must have been cooked to bacteria killing perfection.

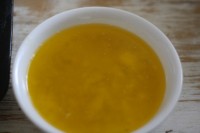
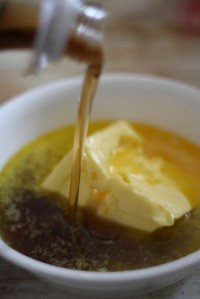
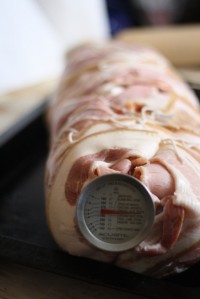
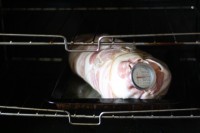
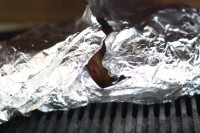
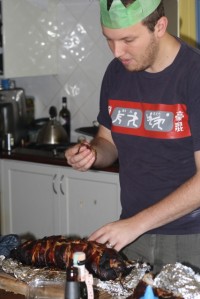
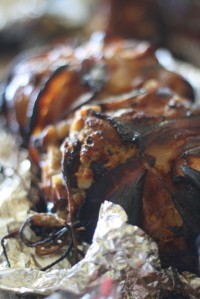
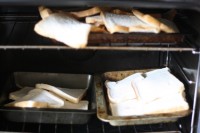
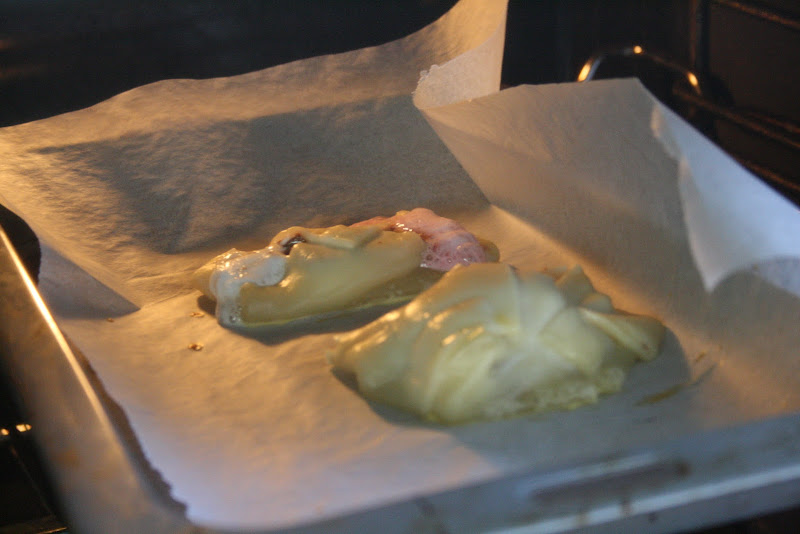
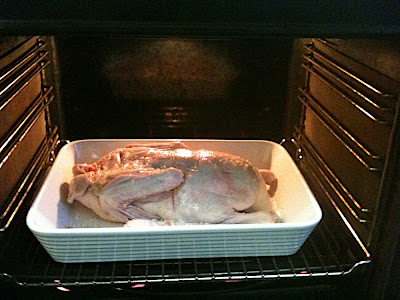
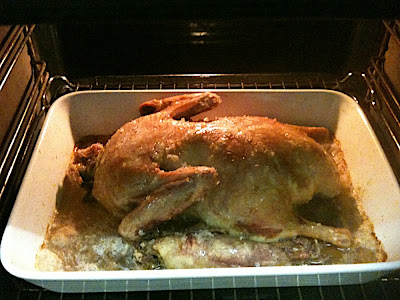
It started off in our oven at home – glazed with the butter/maple glaze. Uncovered for the first 20 minutes or so, and then under a foil tent – to be honest, I probably blackened it a little more than I would’ve liked. I wanted to be able to see the cooking thermometer.

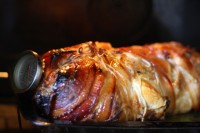
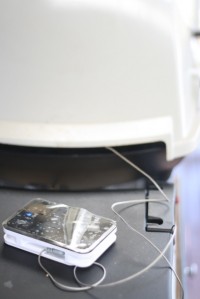
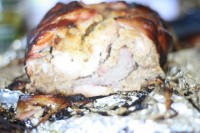
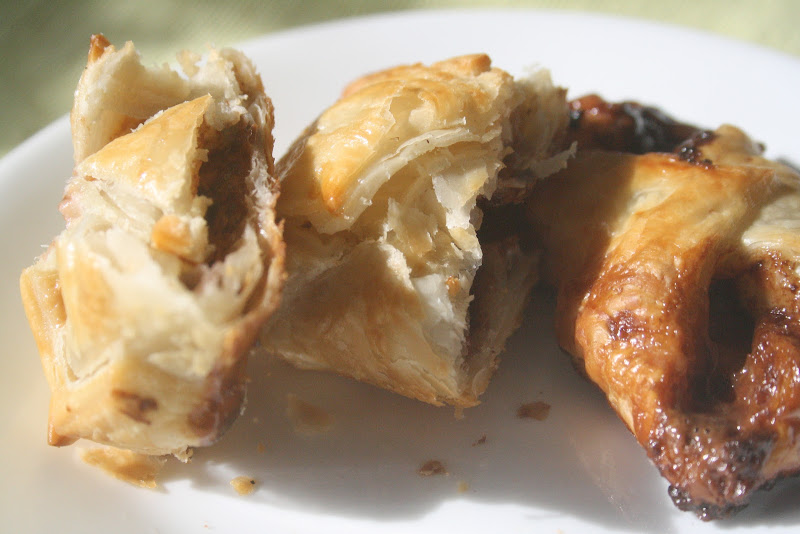
We moved it to mum and dad’s, and their Weber, where it was introduced to dad’s smart probe – a bluetooth probe that sends an updated temperature to your iPhone in real time. The target number was 180 degrees Fahrenheit  And we got there. Sliced the turbaconucken, and served it up. To some acclaim. It’s fantastic as leftovers too.


The Christmas Turbaconucken 2012: Part One

I’ve always wanted to cook a turducken. Or, wrapped in bacon, a Turbaconucken. It’s a chicken, stuffed inside a duck, stuffed inside a turkey. So this is one to tick off the bucket list.

I don’t have the mad deboning skillz to produce a fully-fledged bird shaped delight. So this year I settled for a Turbaconucken Roll.

I’m cooking it tomorrow, with a maple glaze for our family Christmas. So I’ll post some photos, and if required, a post-mortem, tomorrow.

Special thanks to my sister Susie, her boyfriend Rohan, and my patient wife for bringing this all together.

But here’s our ingredients:

Meat

  • Turkey breast x 4
  • Duck breast (de-skinned – I’m attempting to turn the skin into some duck salt) x 4
  • Chicken breast x 4
  • 500gm Bacon Rashers

Stuffing

  • Breadcrumbs (we just cooked some white bread in the oven for a while and then food processed them).
  • Egg x 3
  • Butter (soft or melted)
  • Garlic
  • Pistachio Dukkah

We didn’t have any onions. So I put quite a bit of garlic in.

Split stuffing into three bowls…

  • 1st bowl – add 1 Jar Cranberry Sauce
  • 2nd bowl – add 3/4 Jar Plum Sauce
  • 3rd bowl – add nothing.

Glaze

  • Equal parts Maple Syrup and Butter.

I also picked up some cooking string to bring this all together.

Method.

  • Mix the ingredients of the stuffing together in a big bowl.
  • Bash the life out of the meat until it is as flat as you can get it.
  • Lay out a grid of string.
  • Lay Bacon rashers in a square.
  • Lay out the Turkey fillets – inside the bacon rashers (ie with some bacon overhanging on all sides).
  • Apply layer of Cranberry stuffing.
  • Lay out Duck fillets.
  • Apply layer of Plum stuffing.
  • Lay out Chicken breasts
  • Apply a pile of plain stuffing “on the fold” of the square you’ve made.
  • Fold like a taco.
  • Tie strings together until you’ve got a nice package.

We wrapped ours in glad wrap. Like a sausage. And I’ll be cooking it in the oven tomorrow. I have a meat thermometer.

I found this post particularly useful.

Mind. Blown. Chips in a salt/pepper grinder

This is brilliant.

Via @Buzzfeed

There must be other foods this works for…

Recipe for power hungry eaters: Bolognese Machiavelli

I love this. From a site featuring 101-word stories called ommatidia.


Image Credit: Wikimedia

BOLOGNESE MACHIAVELLI

  1. Arrange to have garlic and onions cast into hot oil.
  2. The carrot and celery you must divide against themselves. Ground beef, too, shall turn upon the burner; crush any coherent resistance with a spoon of wood. Sautee until no hint of blood remains to stain your hands.
  3. Perhaps, in a dark place without witnesses, the tomato shall meet with the knife.
  4. The basil and parsley you may use without consequence. For long minutes, all shall be muddled and roil on the surface of the flame.
  5. If it is most advantageous, store cold for the proper day.
Once, when I was going to write my great Mafia epic, I read Machiavelli’s The Prince. That’s what makes this recipe awesome. But, I think it’s also pretty cool that Assassins Creed features him as a character.

TV Dinners: Cooking food from The Simpsons

The Simpsons provide an almost endless string of possibilities for real life crossovers. There’s a South Park episode that covers the idea that the Simpsons have already done just about every joke known to man. So I’m surprised I haven’t come across more things like this. There was, of course, the real life recreation of the Simpson’s house, a real life rendering of Mr Burns, a real life Nachos Hat, the real life intro video, and some real life Tomacco.

Here’s a Tom Collins Pot Pie…

Recipe

1. Unsure of what actually makes a Tom Collins, we went by what The Internet said and used the following ingredients: ice cubes; 2 oz. dry gin; 2 oz. lemon juice; 1 teaspoon sugar syrup; soda water; slice of lemon; and 1 colored cherry (we actually didn’t include the cherry).
2. Pour the drink into the pie crust
3. Then add a sprinkling of cloves

And how about some corn nog?

Delicious. A few more recipes and reviews here

How to be awesome like MacGyver

Ever wondered how you can turn the resources at your disposal into a quick fix solution for escaping the deadly situation you find yourself in? No?

Well. You’re not MacGyver then. But if you fancy a little bit of MacGyvering you should bookmark this page of MacGyver recipes.

Mad Skillz: How to make toasted Mars Bar sandwiches, and some variations

While I’ve enjoyed posting mad skillz from a few other people (and I have a few more to go), I thought I might contribute a skill of my own… so, without further ado, I give you my updated guide to the production of the world’s most delicious toasted sandwich. For this batch I expanded the recipe to include marshmallows. So I give you. The Toasted Mars Bar and Marshmallow Sandwich.

You’ll need:

Fun size Mars Bars
Marshmallows
Bread
A sandwich toaster (might be best to get a second one, because if you’re not careful you’ll be trying to get rid of the taste of marshmallow for weeks)

Process
It’s all fairly self explanatory:

1. Chop up the marshmallows.

2. Place them on the bread, away from the edges, because you want to make sure they don’t spill over the edges onto the hotplate.

3. Cut up the Mars Bar – I used fun size ones, I think they used to be bigger. This batch probably could have done with some more chocolate to be honest.

4. Place the Mars Bar bits on top of the marshmallow. Put it in the sandwich toaster. You’ll need to check it as it cooks a few times in case a bit of marshmallow leaks. Trust me.

5. Serve. Delicious.

Now. That looks pretty good right? But you can make it a little more gourmet with the introduction of some puffed pastry in the place of the bread.

Either cook them on the toasted sandwich maker (be sure to oil it) – it’ll take about 15 minutes…

…or in the oven – I let these go for about 17 minutes in the end.

With a little bit of egg glaze (1 egg and a dash of water)…

The parcel worked better than the open one.

You could probably dust these with icing sugar to present them all fancy and stuff. They’re best eaten hot, but the insides get very, very, hot. So don’t burn your tongue.

How to make incredible breakfast burritos in Six Steps

Last night, at some time around 11pm, I was talking to reader Tim Goldsmith on Facebook, and in an off hand comment (as he described a technical glitch he was having with this site) he mentioned two magic words. Breakfast burritos. I hadn’t had dinner at this point. I was inspired.

I’d had a breakfast burrito before. On the Sunshine Coast. It was delicious.

I had the ingredients. I still had the oil I’d used in the afternoon for the tortilla chips (I was planning to rebottle it to use again). I was hungry. So I made breakfast burritos. Here’s what I did…

Step 1. Cook the bacon and two eggs.

Step 2. Add some maple syrup and Worcestershire sauce to the bacon. This makes bacon delicious.

I just pour it on top of the cooking bacon – though beware, if you don’t watch it carefully it’ll coat your pan with a layer that’s almost impossible to clean. But it’s worth it.

Step 3. I had some sticky rib BBQ sauce in the fridge, so I put a dollop of that on the tortilla.

Step 4. I loaded up the tortilla with the bacon, some cheese, and then the egg.

Here’s about how cooked it was…

Step 5. Then it was into the frypan (with a bit of really hot oil – probably half a centimetre). It cooked/blackened really quickly. Heaps quicker than the chips.

Step 6. Plate up.

Delicious. It’s now on the menu if ever you come around for breakfast.

How to make awesome and amazing tortilla chips

There’s nothing like a hot snack on a rainy essay day. So today, in between essays, I made some tortilla chips. Which are amazing. Cheap. And delicious. Here’s how…

Heat some hot oil in a frypan. On the stove. I used peanut oil. On the highest temperature. With about three quarters of a centimetre of oil throughout the pan.

Wait till it bubbles a little.

Cut your tortillas into chip shapes.

Put them in oil – once the oil is hot enough each side will cook in somewhere between 20 and 40 seconds.

Put the cooked ones on a piece of paper towel.

Once they’re all done, pile them all up into a bowl and liberally apply sour cream and salsa. They’re also fantastic with mince as Nachos. And great by themselves.

Cookie Monster Cupcakes: These are a pile of awesome

These look amazing. And delicious. And if you make them for me I will love you forever (I’m looking squarely at my wife, but anybody else who wants my affection should also take note).

Here’s how to make them. And a video.

Would you like beer with that marshmallow?

The other day, over at thebeanstalker.com (my coffee blog, read it, click some ads – I make money), I did a little experiment with coffee and beer. I bought a proper coffee beer and made my own. It was science. Tastebud stretching science. I like beer. Nothing beats it on a hot summer’s afternoon. I also like marshmallow. And chocolate. But I’m wondering if chocolate-coated beer-marshmallows is taking things a bridge too far (though coffee beer probably is too). Why not just enjoy all these things separately…

But they look so good.

And here’s how to make them. To whet your appetite – here are the ingredients from this recipe.

Chocolate-Dipped Beer Marshmallows with Crushed Pretzel Garnish
Makes 18-22 marshmallows, depending on how you cut them

For the Bloom:
1 1/2 tablespoons (just under 1/2 ounce) unflavored gelatin
2 teaspoons vanilla extract
1/3 cup (2.5 ounces) flat dark beer

For the Sugar Syrup:
1/4 cup (2 ounces) flat dark beer
1/2 cup + 2 tablespoons (5 ounces) corn syrup or sugar cane syrup
3/4 cup (6 ounces) granulated sugar
pinch salt

For Coating and Topping
10-12 ounces milk chocolate
2-3 teaspoons canola oil, optional – for thinning the melted chocolate
1/2 cup stick pretzels


Gourmet “fast food”

It’s not exactly “Fancy Fast Food” – because it’s not taking the food and repurposing it into something a little bit fancy. But this DIY McRib looks pretty tasty.

“After a quick trip to McD’s, I broke the sandwich down. A very standard-issue six-inch white-flour roll with a dusting of cornmeal on top, lightly toasted. A scattering of raw white onion slivers, which add flavor and crunch. Exactly two dill pickle slices — not three, not five, just two. A slathering of sweet, tangy, tomato-based barbecue sauce with hints of smoke, almost St. Louis style. And the heart of the sandwich, a boneless, flavorless pork patty preformed to look sort of rib-ish, with ridges implying a rack of baby backs. (I have to admit that, to its credit, the meat was terrifically moist, which is probably due to the amount of fat in there.)

Starting with that fatty cut of pork, I decided to reinterpret the McRib using pork belly, which, over the course of a three-hour braise, turns from a three-pound cut into something like the preformed pork patty’s blindingly spectacular cousin. While it cooked, I made a quick pickle and a simple barbecue sauce from scratch, and sliced some red onions — sweeter than the white — to add even more crunch. I stuck with store-bought rolls, but you could easily up the homemade factor and make your own basic white sandwich roll or go really indulgent with a brioche. Sure, it might take a little more time than simply popping down to your local McDonald’s for a McRib, but you’ll never have to worry about whether it’s been taken off the menu.”

There’s a step-by-step guide, and recipe, here.

Duck, Duck, Jus

I love duck. If it’s on the menu at a restaurant, and I’m not paying, I’ll order it every time. I was thrilled, last time I was checking out the meat section at Coles, to find whole ducks for $17.99. I bought one. Tonight, I cooked it. Duck a l’orange style. That’s how I’m spelling it anyway. I mostly followed this recipe here, but I made a few additions.

It was spectacular. I served it with roasted baby carrots, potatoes and garlic.

Here are some grainy iPhone photos.

I was a little surprised to unwrap the duck to find the neck still attached.

I salted the skin and pricked little holes in it (following that recipe) to let the fat drip out during cooking.

This was my little tray of veggies.

Here’s the duck after an hour. It took about three and a half hours to cook.

The sauce was orange juice (squeezed by hand, with a fair bit of pulp), roughly a cup of moscato, a spoon full of orange marmalade, and some of the duck fat. I reduced it a fair bit, basically until it was a syrup. I cut a couple of slices from the middle of each orange to make my candied orange garnish (one of my additions).

I tipped a few lid-fulls of castor sugar (from one of those CSR bottle things… I think they’re CSR bottles) into a fry pan with a dash of water, and let it heat for a little while. Then I dropped my orange pieces in and tried to caramelise them. They ended up tasting a bit like marmalade and being a nice sticky texture. Perfect.

This sauce had been sitting for a while (as I finished off the veggies) a quick stir settled the oil (from the duck juices) back into the orange syrup. Delicious.

Gourmet Crayons

Have you ever looked at the colour of your carrots, peas, or corn and thought “gee, that would make a great crayon?” To be honest, I haven’t either. But I’m still enamoured by this concept – crayons made using food. And they’re edible.


Nice. From Luxirare.

Reverse engineering the perfect hot chip

It’s only three weeks until I can once again enjoy the bountiful wonders of McDonalds and its fast food counterparts. My new financial year resolution for 2009/10 was to give up fast food and soft drink. It’s a shame I didn’t hear about this sooner… this food blogger will go down in history as the man who reverse engineered McDonald’s fries so that you can enjoy them at home… add this to your own homemade KFC with 11 reverse engineered herbs and spices, and you’ve got the perfect meal to enjoy with the World Cup in the early hours of the morning.

In a ground breaking piece of research he managed to get hold of a batch of frozen fries (through some vicarious deception) to put them through the rigours of scientific investigation.

He started with the following parameters for the perfect batch of fries, lets call them “the golden rules”:

  1. The exterior must be very crisp, but not tough.
  2. The interior must be intact, fluffy, and have a strong potato flavor.
  3. The fry must be an even, light golden blond
  4. The fry must stay crisp and tasty for at least as long as it takes to eat a full serving.

Here’s how he secured the frozen fries. He had a friend on Facebook create a scavenger hunt with frozen fries as a required element. Genius.

He measured them:

They’re precisely a quarter of an inch thick.

He fried them in regular peanut oil (and saw that they were good)…

So concluded that the mystery was in the method of potato preparation. He goes into the science quite extensively, examining the changes in potato structure at every turn (McDonald’s fries are blanched, pre-fried, and frozen again). Then he stumbled on to a brilliant addition to the McDonalds method, perfect for home chefs… putting vinegar in the water used to blanch the potatos.

He claims the proof of the potato is in the eating, but here’s the recipe